Tilt-Shift is the technique used to create a photo that looks like a model village. You can simulate this effect in software. It is an illusion created by manipulating the focus in the picture. By blurring the image horizontally we confuse the viewer and the brain interprets the distance and scale differently. The image appears to present in focus objects as being tiny when compared to the normal sized objects which are blurred in the image. The effect is enhanced by increasing the colour saturation in the photo. Luminosity and contrast can be adjusted too if needed. Below I will take you through the steps to simulate tilt-shift photos.
Equipment
- For this you need a photo
- Editing software, such as Photoshop or the GIMP (The Free & Open Source Image Editor, available from their site)
Steps
Time needed: 15 minutes
Simple method to simulate tilt-shift photos
- Select the best photo
Choose an suitable photo – this should be a wide angle photo that does not include the sun and sky. It should also be taken looking down on the scene
- Open the photo
Open the photo in the software, for example the free GIMP.
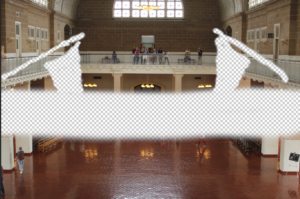
- Duplicate the image and add a mask
Duplicate the image and add a mask, which will be used to select the horizontal part of the image to remain focused while the rest is blurred.
- Blur the remainder of the image
Select the image and apply a blur to the image. The choice of blur will depend on the software release you are using but is not critical. I use lens blur.
- Increase the saturation of the image
Using the menu, Try +30 to start.
Other considerations
Photoshop has tilt-shift blur in the blur gallery, so you can see where the focus strip is and the result in real-time.
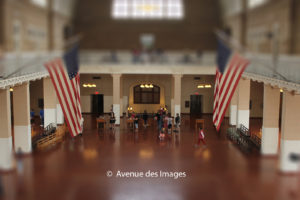
Sometimes items that need to be in focus to make sense of the image will not be in the straight horizontal strip. In this case you must adjust the mask to include them. Take this image below. The flags are not entirely in the same strip as the people. So the Photoshop tilt-shift blur gallery tool would have to include most of the image if we expanded the strip to include all the flags. This is not what we are trying to achieve.
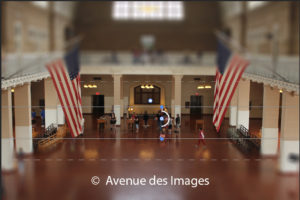
The top part of the flags is blurred. This gives an unsatisfactory effect.
Keeping all the flag in focus is more pleasing and improves the simulation. Although in reality the flags are much closer to the photographer than the people. The result is more satisfactory.
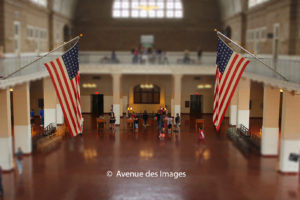
We do this using a mask so we can be more selective and include all the flags in our selection to remain in focus.
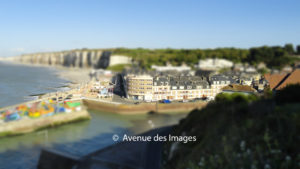
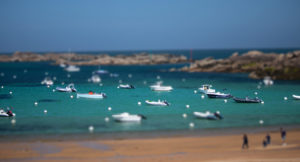
In the gallery above there’s a picture of the beach at Trègastel. There’s another photo from Trègastel in the lighting section.
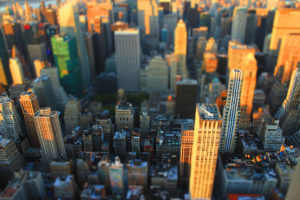
You can find another post relating to New York here.
There are more tips on this external site.
Purchase your own copy of my work
Some of my photos are available for purchase on my Adobe Stock store or directly below.