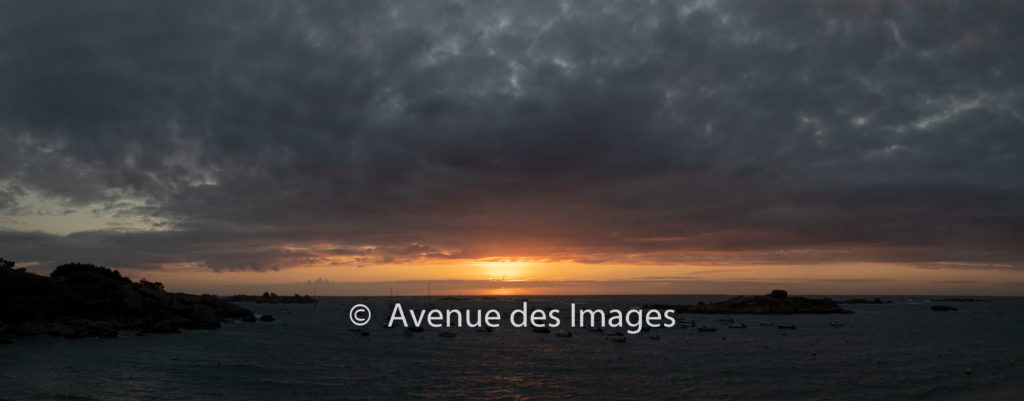
Armed with my camera and tripod and a westerly facing beach I decided to capture a sunset. A fairly quiet sea, some interesting clouds and some small boats in the bay made for an interesting composition. The idea was to use photo stitching to make a panorama. Photo merging, a nice feature of apps, takes overlapping photographs and builds a single image from all those selected. Photo Merging to make a panorama stitches together overlapping photos.
Camera setup
I set the camera up with a wide, 18mm focal length, an ISO of 100 to reduce any noise from the pictures. Noise doesn’t really show up on the small screen of the camera but will be visible back at home on the PC screen. It shows up as a sprinkling of tiny dots of varied colours. As its a sunset it is naturally dark, so set a longish exposure. I took these at 1/30s. Longer exposures would potentially lead to issues with the boats moving or waves. Shorter exposures could prove incompatible with an ISO of 100.
The steps
To stitch together photos, the software needs a good overlap for each photo. Let’s say 2/3s as a minimum. They also need to be moving across the same horizontal line. To do this you need to have reference points. For a sunset the horizon and the sun are obvious candidates. Remembering not to look at the bright sun which will damage your eyes and camera. On the screen of the camera make sure the grid is switched on on the screen. If there is a level on the screen the tripod or the camera use this to help ensure the sequence of photos are on the same level.
The photos
So here are the series of photos I took. You can see the sun creeps gradually across the image from right to left.
Post session editing
I used Adobe Lightroom to stitch them together and verify the horizontal. Under the Photo menu is the command “Photo Merge”. It offers 3 options: HDR, Panorama, and HDR Panorama. HDR is for creating High Dynamic Range images, which have more exposures combined together into one image. It has become popular on recent TVs. But that is not what we need. we need the 2nd option : Panorama. Select the photographs, with control or shift, pressed if needed and use the Photo Merging to make a panorama.

The very observant of you will notice that I also used the Photoshop healing brush to remove the streetlamp towards the right side which I felt added nothing to the composition. Especially as they are no longer operational anyway in an attempt to reduce light pollution.
This technique can be used rather than grabbing your smartphone and spinning around. It will give you bigger and better images. It can also be used vertically.
You can see other examples on my landscape page.
These photographs were taken at the end of the golden hour. What is that? Read more.
Some of my photos are available for purchase on my Adobe Stock store or via the link in the menu or directly below.